The Blog
Color Correcting Photos in Two Clicks
September 28, 2022
Table of Contents
Share on Social Media!
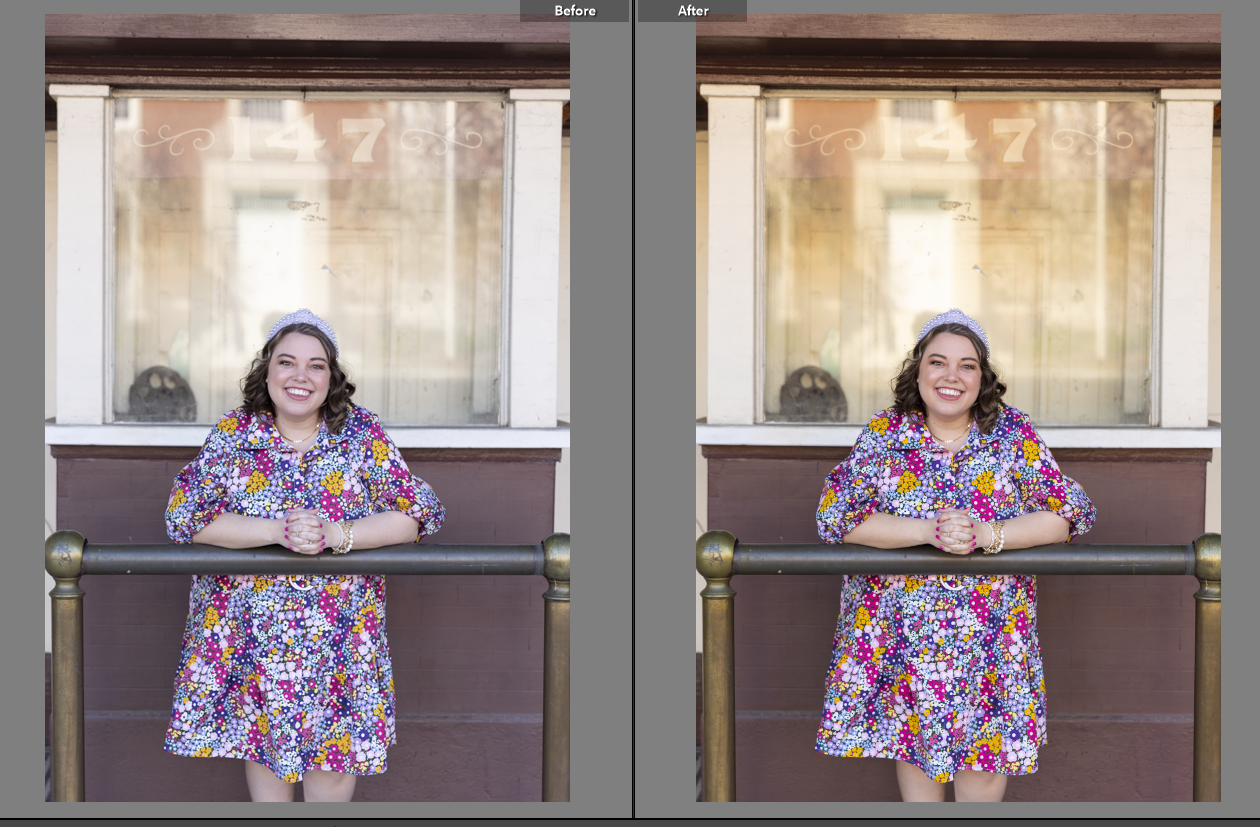
Have you ever looked at a photo and felt like something was a little bit off? After trying the usual suspects of straightening the horizon lines and cropping out distracting things, does something still not seem right? Maybe color correcting the photo will help solve the problem. The coloring of the photo is also known as the white balance. This post will teach you what white balance is, how to correct it, and a few of the techniques I’ve learned over the years.
Read to the end of this blog post to download my editing checklist that will take your editing process from overwhelming to done in six steps!
Color Correcting Photos in Two Clicks – What is White Balance?
White balance, simply put, is the color temperature of the light that you are working with. (Not the actual temperature, there are no traditional thermometers needed.) Think of buying light bulbs. Usually you have a choice between ones that are more yellow, ones that look more white, and some that have a bluer tint. (Not an actual yellow or blue light bulb.) Or, another great example, is the light outside at different times of day. During golden hour, the light is a golden, yellow color. In the evening, after golden hour, comes sunset then what is sometimes called blue hour because of the blue tint to the light.
If this seems confusing, just start with the fact that light comes in different color temperatures, ranging from blue to yellow. Unless you are intentionally creating a photo with a color tint, your goal with white balance is to balance the blue and the yellow so you get a color that is closest to the true color of whatever you are photographing.

Color Correcting Photos in Two Clicks – How to Fix White Balance?
Because most of you reading this are not photographers (and maybe not even shooting on a traditional camera), this section is going to mostly focus on post-processing. However, there is something you can do before you take the photo that can help your white balance. Depending on the type of phone you have, some of them let you change the light settings.
For example, if you choose Portrait Mode on an iPhone 11, you can change between ‘Natural Light’ and ‘Studio Light’.
When you are looking to change the white balance after the photo has been taken, you’ll have to do it in post-processing. If you are using Lightroom, you’ll see a section at the top called ‘White Balance’. There will be two sliders underneath called ‘Temp’ and ‘Tint’. Temp will run from blue to yellow and Tint will run from green to pink. These are the two tools you will need to adjust white balance.
Note – My editing style is a bit richer in colors than some others, so I increase the vibrance and saturation on all of my photos. I also increase those first before messing with the white balance. It can be done in either order, but there’s nothing more annoying to me than nailing the white balance only to then have it thrown off by an increase in vibrancy and saturation.
To identify which way the white balance sliders need to go, look at your photo. If it doesn’t look quite right, try to identify which color you are seeing too much of. Does it look blue? Slide the Temp towards yellow. Does your subject look like they spent too much time in the tanning booth? Slide the Temp towards blue. Personally, I find identifying an issue with the temp bar much easier than identifying an issue with the Tint bar. For the tint bar, I tend to hone in on skin tone. I find that to be the easiest place to see if there’s too much green or too much pink.
Color Correcting Photos in Two Clicks – A Few Notes on White Balance
- If you take multiple shots of your subject in the same location and the lighting hasn’t changed, then the white balance should be very similar. Whatever fix you applied to the one photo will be almost exactly what you apply to the next one.
- If you take multiple shots of your subject in the same location, but the sun has changed (either gone in or out or clouds have moved), the white balance fix will probably be different. How different will depend on how severely the lighting situation changed.
- I promise that fixing white balance gets easier with practice. It used to be my most hated part of editing, now it is less of an issue for me.
- Situations where you have spotty light or harsh light will make white balance harder to fix in post processing. Having your subject in consistent light and open shade will make this exponentially easier. Refer to my post on open shade here.
Color Correcting Photos in Two Clicks – Conclusion
Editing and color correcting photos can feel really intimidating in the beginning. I totally get it. But they are skills that have to come with practice. Are you curious about my entire editing system? Grab my free checklist below that will give you each step in my editing process plus a before and after comparison to remind you that nobody always gets it right straight out of the camera!
